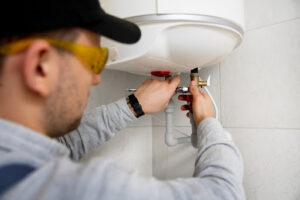
Water softeners are essential appliances designed to remove minerals such as calcium and magnesium from hard water, thereby preventing scale buildup and improving the quality of water for various household uses. If you’re considering installing a water softener in your home, understanding the installation process is crucial for ensuring optimal performance and efficiency. In this comprehensive guide, we will explore the key steps involved in water softener installation, important considerations to keep in mind, and the benefits of investing in a water softening system.
The Benefits of Water Softening
Prevention of Scale Buildup
Hard water contains high levels of minerals that can accumulate and form scale deposits on plumbing fixtures, appliances, and surfaces. Over time, scale buildup can lead to reduced water flow, decreased efficiency of appliances such as water heaters and dishwashers, and costly repairs. Water softener installation helps prevent scale formation, prolonging the lifespan of your plumbing system and appliances.
Improved Water Quality
Water softened by a water softener feels noticeably smoother on the skin and leaves dishes, glassware, and laundry looking cleaner and brighter. Softened water also requires less soap and detergent to lather effectively, resulting in savings on cleaning products and reducing the environmental impact of wastewater.
Protection of Plumbing Infrastructure
Hard water can cause corrosion and damage to pipes, fixtures, and water-using appliances, leading to leaks, clogs, and premature failure. By removing minerals that contribute to hardness, water softeners help protect your home’s plumbing infrastructure and prolong its service life, saving you money on repairs and replacements in the long run.
Planning for Water Softener Installation
Assessing Water Hardness
Before installing a water softener, it’s essential to determine the hardness level of your water supply. You can use water testing kits or contact your local water utility to obtain information about water quality and hardness in your area. Understanding the hardness level will help you select an appropriate water softener and determine the size and capacity required to meet your household’s needs.
Choosing the Right Location
Selecting the right location for your water softener is crucial for efficient operation and ease of maintenance. Ideally, the water softener should be installed close to the main water supply line and drain, preferably in a dry, well-ventilated area such as a basement or utility room. Ensure that there is sufficient space around the unit for servicing and that it is easily accessible for routine maintenance tasks.
Determining Water Usage
Consider your household’s water usage patterns and daily water consumption when selecting a water softener. Larger households with higher water demand may require a higher-capacity unit to ensure an adequate supply of softened water. Factor in the number of occupants, frequency of water usage, and peak demand periods when choosing the size and capacity of the water softener.
The Water Softener Installation Process
Preparation and Setup
Before beginning the installation process, gather all the necessary tools and materials, including plumbing fittings, tubing, and a bypass valve kit. Shut off the main water supply to your home and drain the plumbing system to prevent water from flowing during installation. Familiarize yourself with the manufacturer’s instructions and installation guidelines for your specific water softener model.
Installation of Bypass Valve
Install a bypass valve to allow for easy maintenance and servicing of the water softener without interrupting water supply to your home. The bypass valve diverts water flow around the water softener when necessary, such as during regeneration cycles or maintenance tasks.
Connection to Water Supply
Connect the water softener to the main water supply line using the appropriate fittings and tubing. Ensure that all connections are secure and leak-free to prevent water damage and maintain proper operation of the unit. Follow the manufacturer’s instructions for connecting inlet and outlet pipes, as well as any additional plumbing components required for installation.
Installation of Drain Line
Connect the drain line from the water softener to a suitable drain or wastewater disposal point. Ensure that the drain line is properly positioned and secured to prevent leaks or backflow. Follow local plumbing codes and regulations regarding drain line installation and discharge requirements.
Initial Startup and Programming
Once the water softener is installed and connected, initiate the initial startup sequence as per the manufacturer’s instructions. This may involve setting the regeneration schedule, adjusting water hardness settings, and programming any additional features or functions specific to your water softener model. Test the system for proper operation and check for any leaks or malfunctions before putting it into service.
Conclusion
Water softener installation is a straightforward process that can provide numerous benefits for your home and family. By removing hardness minerals from your water supply, water softeners help prevent scale buildup, improve water quality, and protect your plumbing infrastructure and appliances from damage. By following the steps outlined in this guide and consulting with a qualified plumbing professional if needed, you can ensure a successful installation and enjoy the long-term benefits of softened water in your home. Don’t let hard water compromise your comfort and convenience – invest in a water softener today and experience the difference it can make in your daily life.


