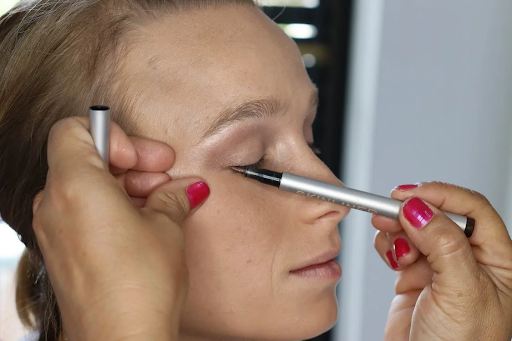
Winged eyeliner is a classic makeup look that has stood the test of time. It can add an instant touch of glamour and sophistication to any makeup look. However, achieving the perfect winged eyeliner can be a daunting task for many. The good news is that with the right tools, such as an eyeliner pen, and the right technique, anyone can master this iconic look. In this article, we will explore the art of winged eyeliner and provide tips and tricks for mastering it with an eyeliner pen.
What is Winged Eyeliner?
Winged eyeliner, also known as cat eyeliner, is a makeup technique where the eyeliner extends beyond the outer corner of the eye, creating a wing-like effect. This look is often associated with retro and vintage styles and has been popularized by iconic figures such as Audrey Hepburn and Brigitte Bardot. The winged eyeliner look can vary in intensity, from subtle and soft to bold and dramatic.
Choosing the Right Eyeliner Pen
When it comes to mastering the winged eyeliner look, having the right tools is essential. An eyeliner pen is a popular choice for achieving precise and clean lines. Here are some factors to consider when choosing an eyeliner pen:
1. Tip Shape: The tip shape of an eyeliner pen is crucial in achieving the desired look. A felt tip pen is great for creating thin and precise lines, while a brush tip pen allows for more flexibility and thicker lines. Decide which tip shape suits your needs and skill level.
2. Pigmentation: The pigmentation of the eyeliner pen determines how vibrant and intense the color appears on the eyelid. Look for pens with high pigmentation to ensure a bold and long-lasting look.
3. Longevity: Nobody wants their eyeliner to smudge or fade throughout the day. Opt for an eyeliner pen that is known for its longevity and smudge-proof formula. Waterproof options are particularly useful for those with oily eyelids or in humid environments.
4. Ease of Use: A good eyeliner pen should be easy to handle and manoeuvre. Look for pens with a comfortable grip and a smooth application. Practice with different options to find one that feels natural in your hand.
5. Brand Reputation: Consider the reputation of the brand when choosing an eyeliner pen. Look for trusted brands that are known for producing high-quality and reliable products. Reading reviews and seeking recommendations can help in making an informed decision.
Remember, practice makes perfect when it comes to mastering the winged eyeliner look. Experiment with different eyeliner pens to find the one that works best for you, and don’t be afraid to try different techniques to achieve the desired result.
Prepping the Eyes
Before diving into the winged eyeliner application, it is important to prep the eyes properly. Start by applying a primer or an eyeshadow base to create a smooth canvas for the eyeliner. This will help the eyeliner to adhere better and last longer. Next, apply your eyeshadow and mascara before moving on to the eyeliner. This will prevent any smudging or smearing of the eyeliner while you apply it.
Once the eyes are prepped, it’s time to tackle the winged eyeliner. Here’s a step-by-step guide to achieving the perfect wing:
1. Choose your eyeliner: There are various types of eyeliners available, such as liquid, gel, and pencil. Choose the one that you are most comfortable with and that gives you the desired finish.
2. Start with a thin line: Begin by drawing a thin line along your upper lash line, starting from the inner corner of the eye and working towards the outer corner. This will serve as the base of your wing.
3. Outline the wing: To create the wing, imagine an extension of your lower lash line and draw a diagonal line upwards towards the end of your eyebrow. The angle and length of the wing can be adjusted according to your preference and eye shape.
4. Connect the wing: From the tip of the wing, draw a line back towards the upper lash line, creating a triangle shape. Make sure to fill in any gaps and ensure a smooth, even line.
5. Fill in the rest: Once the wing is complete, go back to the inner corner of the eye and fill in the remaining space along the upper lash line. This will create a seamless, continuous line.
6. Clean up any mistakes: Use a cotton swab or a small brush dipped in makeup remover to clean up any smudges or uneven lines. This will give your winged eyeliner a polished finish.
7. Set the eyeliner: To prevent smudging or fading, set your eyeliner with a matching eyeshadow or a translucent powder. This will help it to stay in place throughout the day or night.
Remember, practice makes perfect when it comes to winged eyeliner. Don’t be discouraged if it takes a few tries to get it right. With time and patience, you’ll be rocking flawless wings in no time.
Creating the Perfect Wing
Now that your eyes are prepped, it’s time to create the perfect winged eyeliner. Follow these steps for a foolproof application:
1. Start by selecting a good quality eyeliner. Look for one that has a fine tip and is easy to control for precise application.
2. Begin at the outer corner of your eye and imagine an imaginary line extending from the outer corner of your eye towards the end of your eyebrow. This will serve as a guide for the wing shape.
3. Place the tip of the eyeliner pen or brush at the outer corner of your eye and create a small dot where you want the wing to end. This dot will help you achieve a symmetrical wing on both eyes.
4. Next, draw a line from the inner corner of your eye to the dot you created. This line should be as close to your lash line as possible. Make sure to keep the line thin and precise.
5. Once you have drawn the line, it’s time to create the wing. Starting from the dot, draw a diagonal line that connects to the line you just created. The length of the wing is up to you, but keep in mind that a shorter wing can create a more subtle look while a longer wing can add more drama.
6. After creating the initial wing shape, fill in any gaps or uneven areas by going over the line again. Make sure the line is smooth and even.
7. Repeat the same steps on your other eye, making sure to match the length and angle of the wing.
8. If you make any mistakes or need to clean up the edges, use a pointed cotton swab dipped in makeup remover to correct any errors.
9. To finish off the look, apply mascara to your lashes for added definition and volume.
Remember, practice makes perfect. Don’t be discouraged if your first attempt isn’t flawless. With time and patience, you’ll master the art of winged eyeliner.
Conclusion
The winged eyeliner look is a timeless and versatile makeup technique that can elevate any makeup look. With the right tools, such as an eyeliner pen, and the right technique, anyone can master this iconic look. Remember to choose an eyeliner pen with a fine and pointed tip, prep your eyes properly, and follow the steps for creating the perfect wing. Don’t be afraid to experiment with different styles and variations to make the winged eyeliner look your own. With practice and patience, you will soon be rocking the winged eyeliner look like a pro.


